Direct-to-Garment Printing & the Power of Pretreating

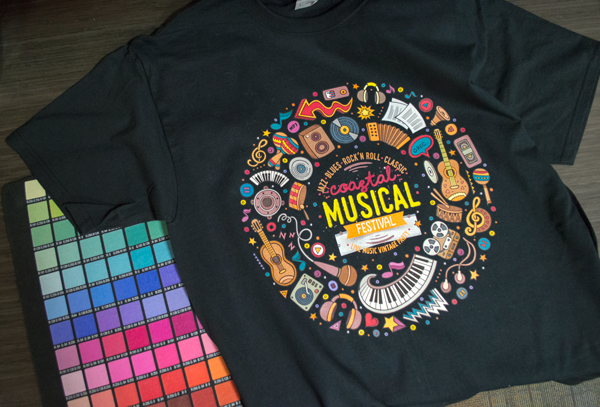
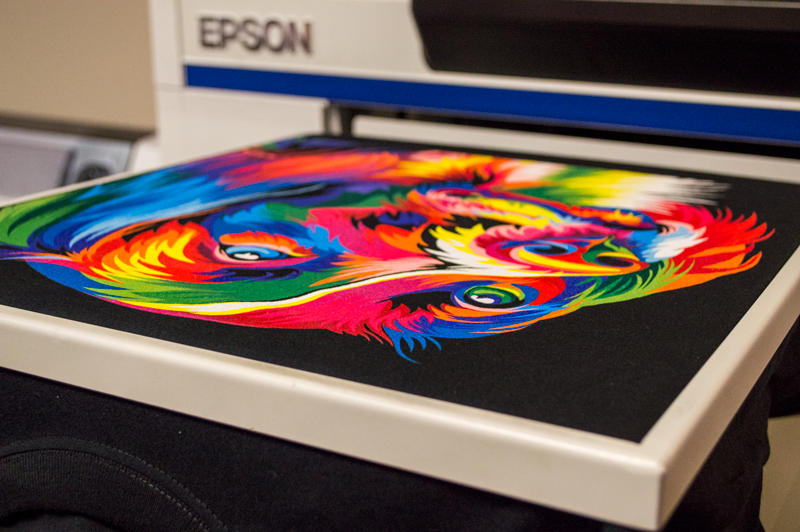
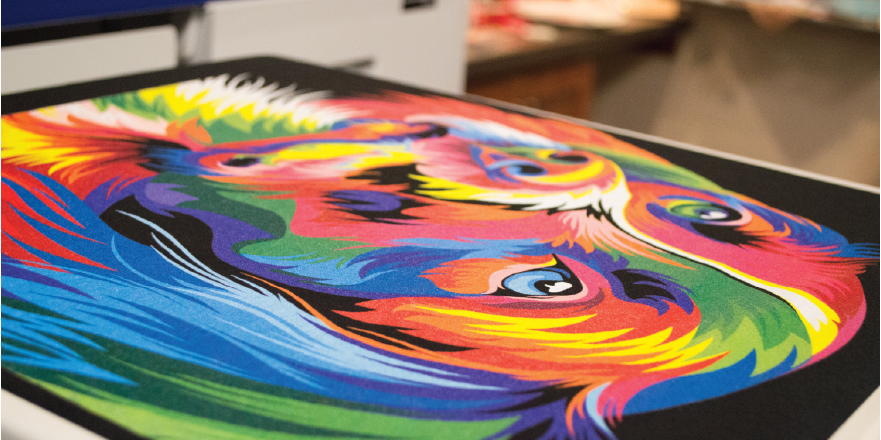
There’s no doubt about it – direct to garment printing with white ink has revolutionized the custom apparel industry. With their compact setups and user-friendly processes, DTG printers provide garment decorators with the ability to create vibrant T-shirts in a matter of minutes.

And now – the screen printers are getting on board.

Why? Because DTG printing makes it easier for screen printing and apparel decoration shops to fulfill lower quantity orders and orders containing high-resolution/multicolored artwork without all of the extra labor and supply costs tied to the traditional screen printing process.

dtg printing full color up close pretreatment solution dark garments tshirts coastal business supplies

Unless you are using EXOstencil Screen Prep Paper or another chemical-free process to create your screens, preparing and reclaiming screens is expensive. Emulsion, degreaser, dehazer – the chemicals alone will set any print shop back a few hundred bucks before factoring in labor, equipment and drying time. And when you’re printing jobs containing 4+ ink colors on the regular…those weekly screen costs add up quickly. Adding DTG printing to your shop’s services can really help cut down on prep costs, which in turn will make your customers happy when you can offer them a one-off T-shirt at a price that won’t break the bank.

Want to make them even happier? Pretreat your dark shirts first every time. EVERY. TIME. One of the biggest factors that plays into the success of printing on dark garments and achieving brilliant results is ensuring that your items are properly pretreated prior to loading your shirts onto the printer. EVERY TIME.

Do I really need to pretreat?

We’re going to say it again – yes, EVERY TIME.

pretreat dark tshirts before dtg printing coastal business supplies

To understand the importance of pretreating, let’s break down its functions. Pretreatment is a clear liquid solution that plays two major roles during the DTG process; first and foremost, it prevents the DTG ink from soaking into the garment during printing. The concept is similar to priming drywall before applying paint – the primer allows the paint to sit on top of the wall’s surface without saturating the wall. Without the primer, the paint would soak into the drywall, causing the final wall color to look dull or muted.

The same is true for pretreating DTG shirts – the pretreatment fills the space in between the weaving of the shirt fibers, which effectively prevents the ink from soaking into the garment and allows for the white ink to adhere to and sit on top of the surface of the shirt. The CMYK inks then sit on top of the stabilized white ink and appear rich in color against the white backdrop. Without the use of pretreatment solution, however, all of the DTG inks will absorb into the fibers of the shirt and you’ll be left with a dingy-looking, unsellable product.

dtg printing pretreatment machine lawson direct to garment coastal business supplies

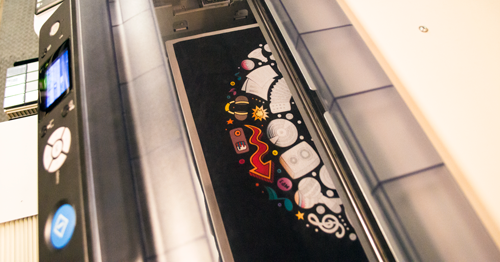
DTG Sorcery: White Ink Flashing & Pretreatment Application

Pretreatment solution also has a secondary core function that is essential to printing with white ink. When the white ink hits the pretreated area, the pretreatment instigates a chemical reaction that causes the ink to semi-cure instantly. It’s the same effect that’s achieved when “flashing” a white underbase during the screen printing process – it produces a smooth, printable surface and prevents the colored inks from mixing when printed on top of the white ink. This results in a detailed and vibrant final print. The pretreating step is incredibly important when a shirt design calls for both white and CMYK inks, as the inks will most definitely mix and become muddled if the white ink is not cured.

Aside from garment choice, the pretreatment process is the most important step in ensuring that your DTG prints come out as vivid and crisp as possible. Pretreatment solution can be administered using either a hand sprayer or a spraying machine (we recommend the Zoom AE — check it out here!). Dilute your pretreatment solution with distilled water before applying it to your garments.

dilute pretreat solution distilled water before dtg printing coastal business supplies

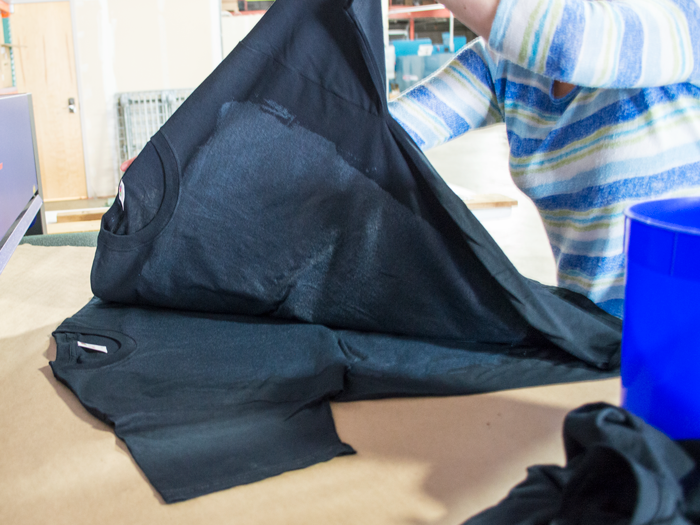
You’ll want to make sure all areas in which ink will be laid down have adequate coverage to avoid misprints. If you choose to stack your shirts as you pretreat them, make sure that you alternate your stacking so the wet sides are touching each other.

pretreatment solution on dark tshirts before dtg printing coastal business supplies

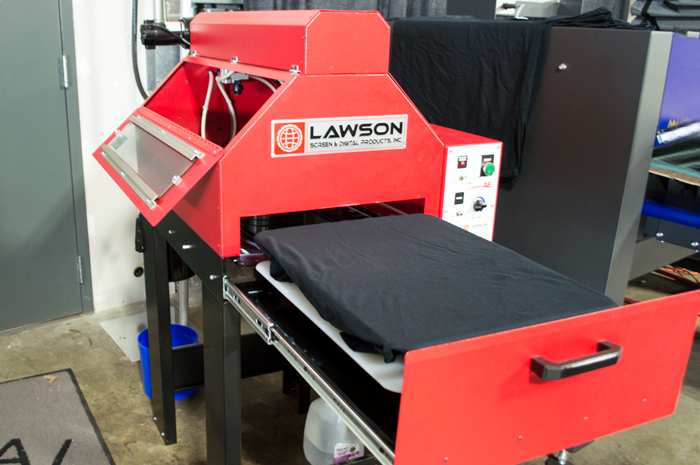
Once applied, allow the pretreatment to either air dry or dry underneath a heat press (our go-to is the Hotronix Fusion Heat Press Machine with the 16″ x 20″ platen). Air-drying your garments does take some extra time, but in doing so it allows the extra moisture to evaporate away from the shirt, which results in a less noticeable “box” imprint that is often caused by a heat press.

When using a heat transfer press to dry pretreat, avoid using a teflon sheet or silicone treated parchment paper to protect the garment — use a piece of non-silicone treated parchment paper instead. Press the pretreated shirt at 338F for 40-45 seconds at medium pressure to ensure the pretreatment has set. Never load a pretreated shirt onto the DTG platen that is not dry, or else the pretreatment solution will not work correctly. After the pretreatment has dried, shirts can be stored if printing is not required immediately. We recommend printing your garments within 30-60 days of pretreatment for the best print results.

Once you have identified the best pretreatment application and coverage techniques suitable for your business, you’ll have the power to deliver DTG magic every time you click print. Always remember, though: applying pretreatment solution is like waving a wizard’s wand over your garments – without it, the magic won’t happen.

Want to know more about direct to garment printing or the pretreatment process? Contact our professional services department to learn about the benefits of adding DTG printing to your business. Our team of pros will give you the insight and assistance necessary to help your shop succeed. Give us a call now: 800 562-7760

Direct-to-Garment Printing: No Job Too Small

Is your screen printing business primarily bringing in medium-high quantity orders?

Are you wondering how you can help more customers and say ‘no’ less?

Do you regularly flinch at the age-old customer question, “Hey, how much does one shirt cost?”

If you mentally responded, “Yes – yes – every single time, yes”, then we already have a good idea of how your one-shirt answer plays out. You bite your tongue, hold back an eye roll and launch into a thorough explanation of how bulk printing and pricing works. You can almost feel your customer inching toward the door as you say words like “minimum quantity”, “underbase cost” and “screen fees”.

Before you can get to the part where one screen-printed shirt costs the same as a trip to the day spa, your customer is no longer your customer – now they’re sitting in your parking lot Googling other print shops that can fit their budget and low-quantity needs.

Direct-to-Garment Printing: Become a One-Stop Shop

Sound familiar? We get it. You’re tired of losing potential life-long customers and business contacts over minimums. Explaining the screen printing process to someone unfamiliar with the industry can be tedious and time-consuming, especially if you know upfront that the sale is DOA due to quantity.

Direct-to-garment (DTG) printing can provide you a one-off solution without the hassle of spelling out screen printing setup costs and additional ink fees. Did we just hear you groan? We know what you’re thinking.

“Well that’s great, but DTG printers are expensive and limiting – I don’t want to invest in a setup that only works on white shirts!”

Again, we understand. But there’s good news.

DTG technology has come a long way from the original modified paper inkjet printers that only printed light garments and carried upfront price tags as high as $250,000. In today’s world, you can in fact create vibrant prints on dark colored shirts using a DTG printer with CMYK and white ink capabilities, such as the Epson SureColor F2000 White Edition (and you can afford it, too).

dtg printing on dark shirts coastal business supplies

Full-Color, High Detail? Yes, Even on Dark Shirts!

The science behind DTG printing full-color images on dark garments is fairly simple to understand. The premise is the same as laying down a white underbase when screen printing light ink colors on black shirts.

The DTG printer applies a layer of white ink to the shirt first before printing the CMYK inks directly on top, which allows for vibrancy and clarity within the print. With DTG printing, you can achieve all of the gradients, shadows and high-resolution components that are sacrificed when converting artwork for the screen printing process, not to mention the ability to print in millions of colors without the extra costs tied to labor and screens.

While there are so many delicate variables surrounding DTG printing that fall on the user (like artwork setup and pretreatment methods), once you’ve mastered the basics of preparing your image files and properly pretreating your dark shirts you can print high-resolution, photographic and full-color T-shirts in less than five minutes.

Epson has internally developed a top of the line, easy-to-use Garment Creator Imaging Software (which is free for anyone to download) with dozens of straightforward customizable settings that makes preparing your artwork for DTG printing uncomplicated and pain-free. The big factors that lead to a successful, vivid print include garment composition, correct pretreatment coverage, regular DTG printer maintenance and – of course – a little bit of patience.

Are you ready to stop telling your small quantity prospects ‘no’? Want to give DTG printing a try? Drop our professional services department a line to learn more about the benefits of offering direct-to-garment printing. Our team of pros will train you on the best practices and machine maintenance methods to ensure you are saying ‘yes’ to every T-shirt sale, no matter how small. Give us a call now: 800 562-7760

Creating Rhinestone Templates in Silhouette Studio

finishedIt is February and Valentine’s theme is all around us. With that in mind, we are bringing you detailed instructions on customizing and creating your own rhinestone template designs that you can fall in love with! All you need is the Cameo, Silhouette Studio Designer edition, Sticky Flock, and of course – rhinestones!

To install the Designer edition- open the Silhouette Studio® software program, go to the “Help” menu, select” Upgrade Silhouette Studio”, enter the following: Designer Edition license key, Silhouette account email address, Silhouette account password. Click on the “Submit” button. The license key will then be applied and the software will be upgraded immediately. If you need to locate this number, you may find it by signing into your account either in the Silhouette Design Store in the software, or by signing into your account through the website. Once logged in, you may go to the My Account page. Your license key code will be listed under Silhouette Studio Keys. In the Silhouette Design Store, the number is listed at the bottom of the main account page. The Silhouette Studio Designer Edition code can only be applied twice.

You can create designs in Silhouette Studio’s Designer Edition by converting simple images to rhinestones, by point and click or completely freehand drawing. In our example, we have combined all three options.

Open your image by going to File, then Open:

screen1

A simple silhouette or an outline is easy and more flexible to work with for rhinestones.


page settings
In the page settings window, adjust the size of your rhinestone template material (StickyFlock). We are not using a cutting mat for our example so our setting is “none”, however if using a cutting mat, select the cutting mat size from the drop down menu. It is important to do these steps in order to size and place your design correctly based on the cutting area you are dealing with. page settings If you are working with JPG, BMP, PNG or another type of raster file, you will have to trace the image to create a vector version of it. Refrain from scaling up the image for now. NOTE: Raster graphics can typically be scaled down with no loss of quality, but enlarging a raster image causes it to look blocky and “pixelated.” Because vector-based images are not made up of a specific number of dots like rasters are, they can be scaled to a larger size and not lose any image quality. Raster files: BMP, .TIF, .GIF, .JPG Vector files: .AI, .EPS, .SVG, .DRW


If you don’t know how to trace an image, please visit our Print and Cut tutorial and see steps 2 to 12 for detailed instructions. http://blog.coastalbusiness.com/print-and-cut-tutorial/

traced glass
For our example, we traced around the wine glass silhouette, unchecked both High Pass and Low pass filter and selected Trace Outer Edge since we don’t have any details. Your object should be completely yellow to tell the program what it is tracing around. traced glass Before selecting Trace Outer Edge- object is all yellow


beforetrace
After selecting Trace Outer Edge- there is now a red outline around the object. We moved the image slightly to the right to see if we are satisfied with the result. The black silhouette layer is the raster image and the red outline layer is the vector image. 4. You can go ahead and delete your raster image as you don’t need it anymore. What you should be left with is just your traced outline (vector). With the image selected, you can comfortably size your vector image bigger or smaller by dragging one of the four corners in or out.

after trace


rhinestone window
Once you have the size you want, click on the “Rhinestone Window” button.


rhinestone fill
With the image selected, click on one of the options on the right under Rhinestone effect. The four options are None, Edge, Linear Line and Radial Fill. The Edge option lines your design edge with rhinestones, while the Linear and Radial Fill fill the design with various patterns. Play around and see which one produces your most desired effect. Then under Rhinestone size, select the size of rhinestone you would like. Smaller sizes result in more detail. rhinestone fill For our design, we selected radial fill and 10 ss.


Selected area for deletion by clicking and dragging
At this point, we are ready to customize our design. The first step in our design is to remove half of the rhinestones in the glass so it looks like there is liquid about halfway up. Also there are some details at the bottom of the glass that we want to remove as well. To do that, have your image selected and on the right within your settings, scroll all the way down and click on Release Rhinestones. Now you have each individual rhinestone separated from the others. By clicking on one, you can move it or delete it and by clicking in an empty area and dragging, you can select multiple rhinestones.


before rhinestone
Before (click and delete)
rhinestone after
After


Finished
Finished


single click
After removing the desired areas, you can then place rhinestones by hand using either the Single Click or Freehand option on the right.


detail1
We created the heart on top of the wine glass by drawing it in that position using the Freehand option and selecting the 6ss size rhinestones. After what roughly looked like a heart, we selected all newly created areas, clicked on Release Rhinestones and moved around the rhinestones to shape them into a perfect heart. If there are gaps, you can add a single rhinestone at a time by selecting Single Click.
detail 2
If you have overlapping sections, you will have to delete extra rhinestones by individually selecting them. You may have to move a few or add an extra one here and there to make the design more complete. 10. Once you have your design finalized, you have the option to leave it as is or group all the rhinestones back together to have one cohesive piece that you can move. Click and drag around all elements, then right click and choose “Group.”


DO NOT resize your design once it has been converted to rhinestones. The rhinestone size has been set and drawn exactly as is, so if you resize and run it through the cutter, the holes will not match the rhinestones.

rhinestone count
You can find out how many rhinestones your design requires once finished. In the Rhinestones settings page, all the way at the bottom there is Totals (all shapes) section. That shows the total number used from each size.


Design
Enjoy your design! Here is ours!


Mix and Match Idea!

vinyl mix
You can mix in rhinestones with a vinyl cut design. Just use the Single Click option to add exact size rhinestones to any design. The cutter will cut them out and once you press your vinyl on your material, you can then place your rhinestones in the sized holes within the design and press again.