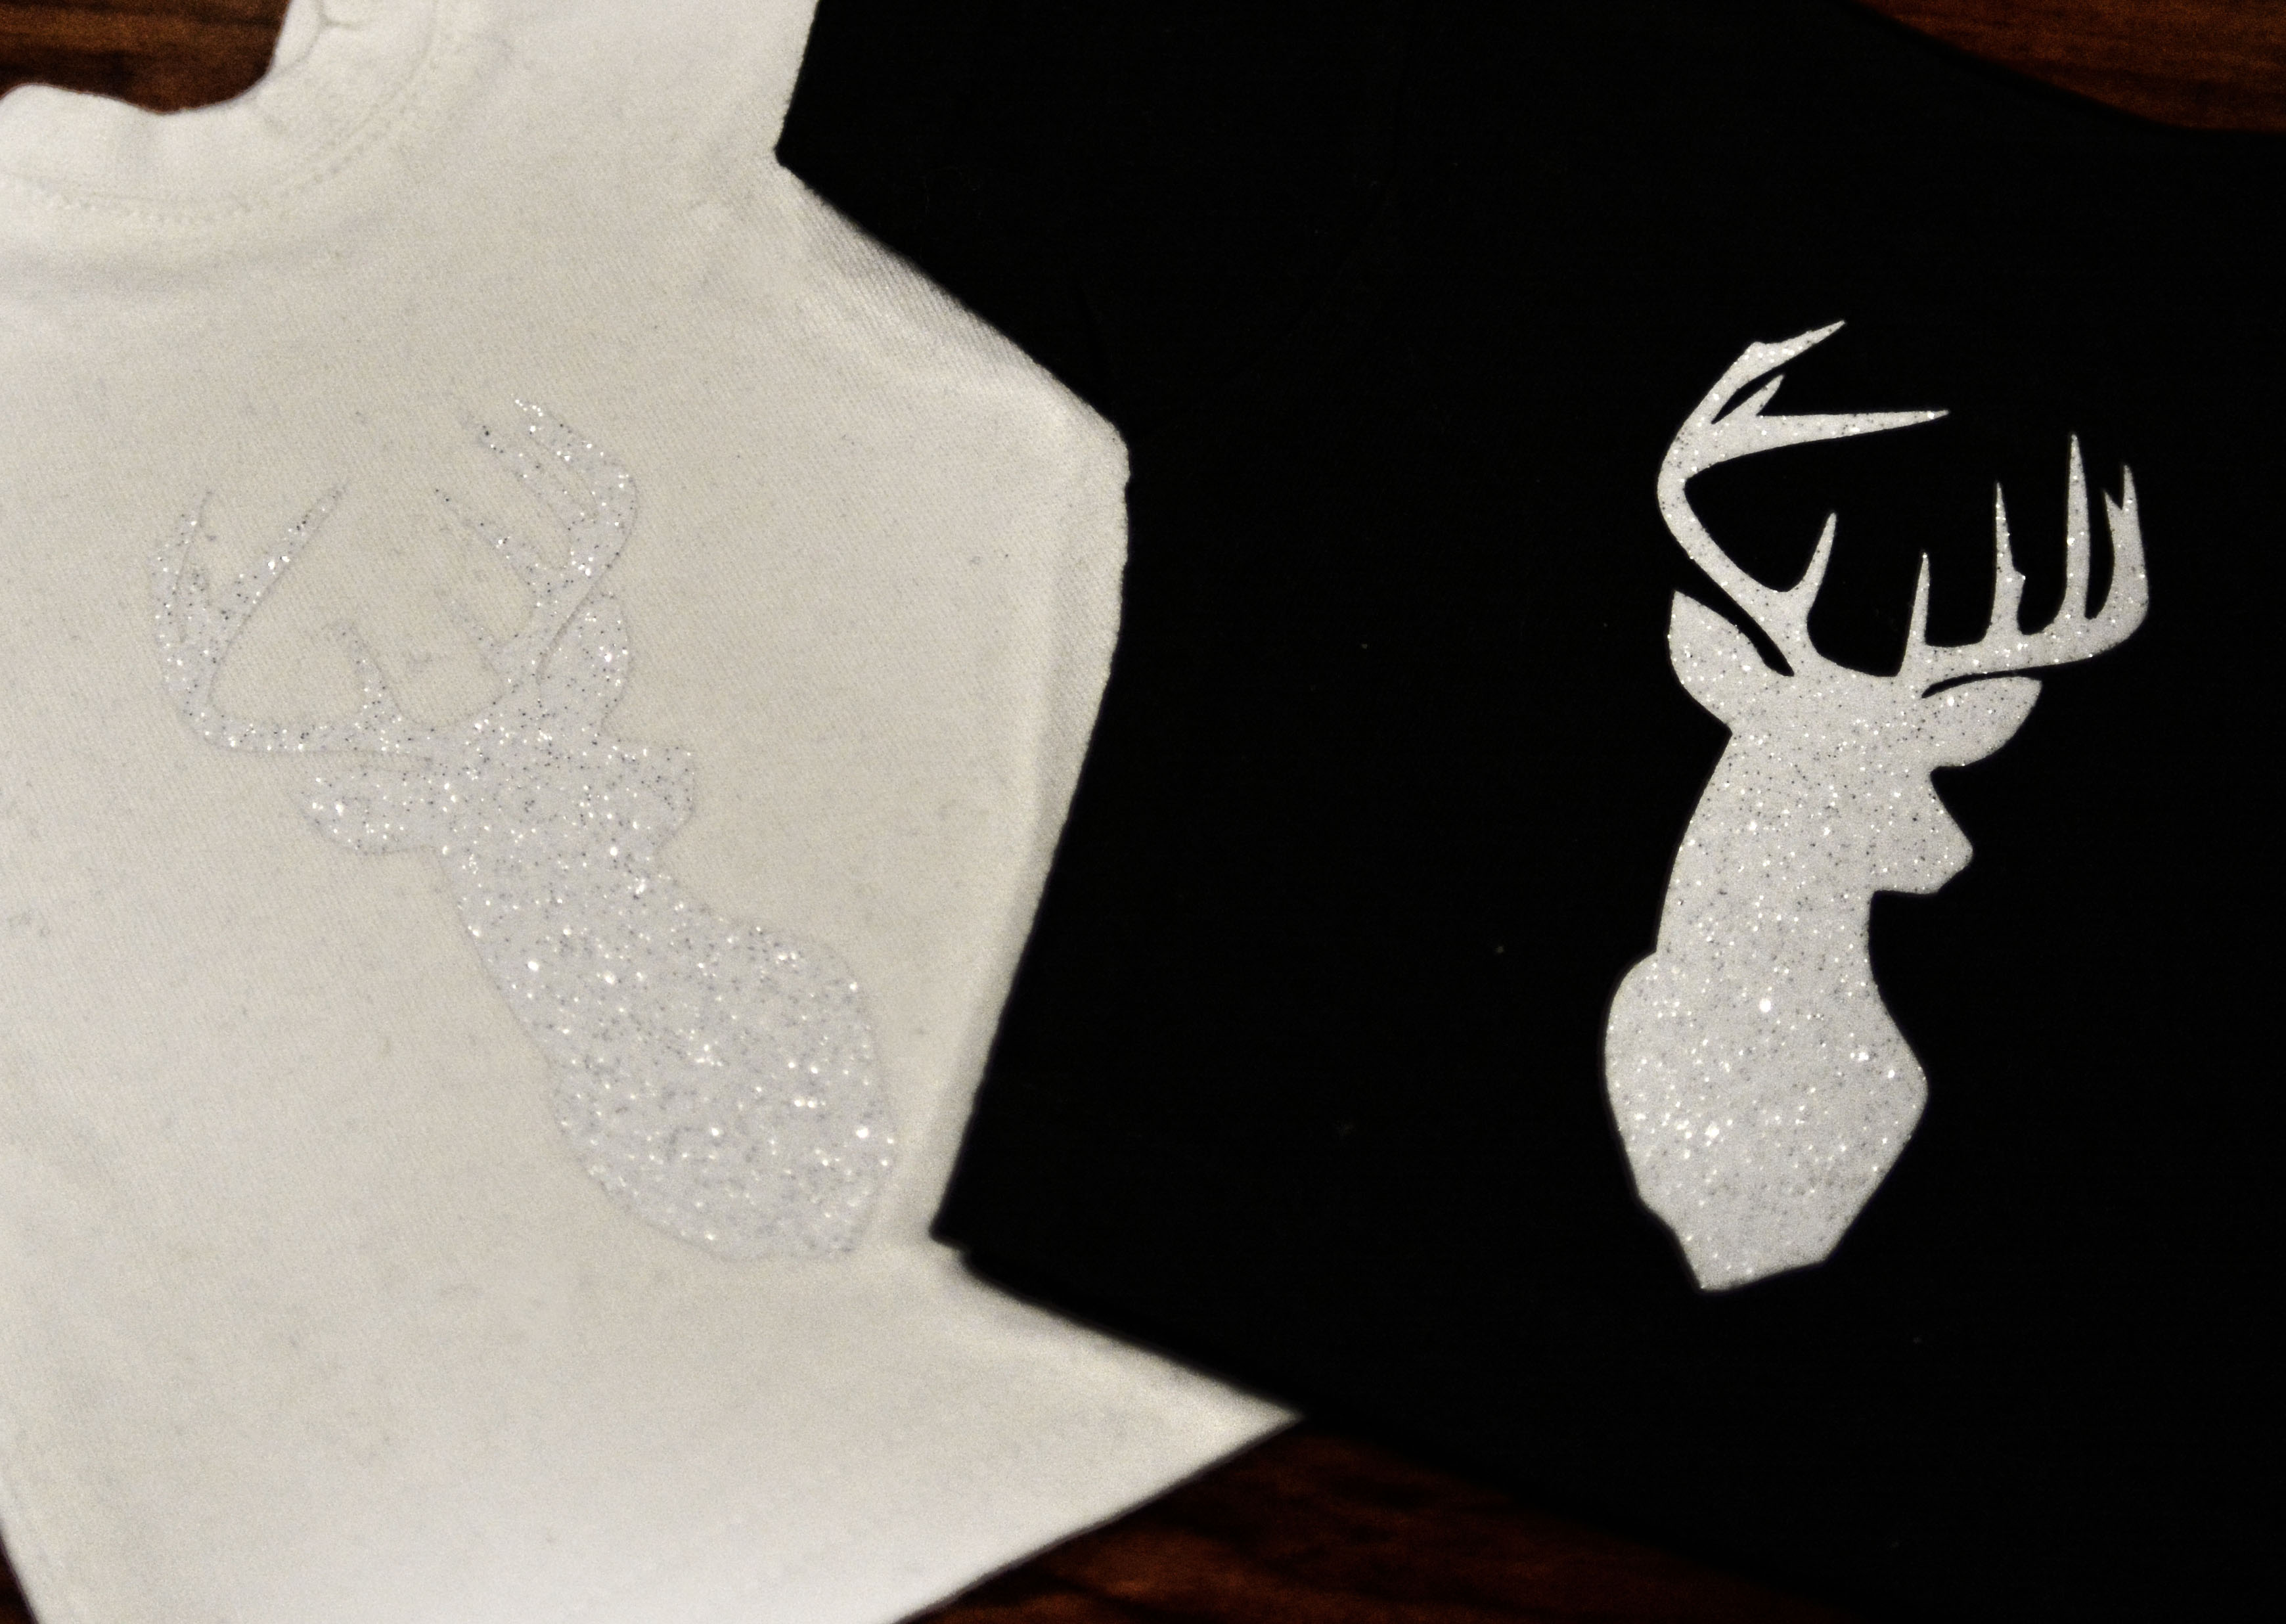
Here at Coastal we like to experiment from time to time with our products. This is how we found out that we can actually use the sublimation process on white glitter flake vinyl and end up with a pretty cool effect.
For my demo, I wanted to test the process on black and white 100% cotton fabric. The white fabric was more of a fun test, knowing that the fabric will be dyed a little bit temporarily (we have heard that it does wash out with time unlike polyester which is permanent). I knew the black would work much better because black can’t be dyed and the bleed area won’t show up at all (and that’s my goal).
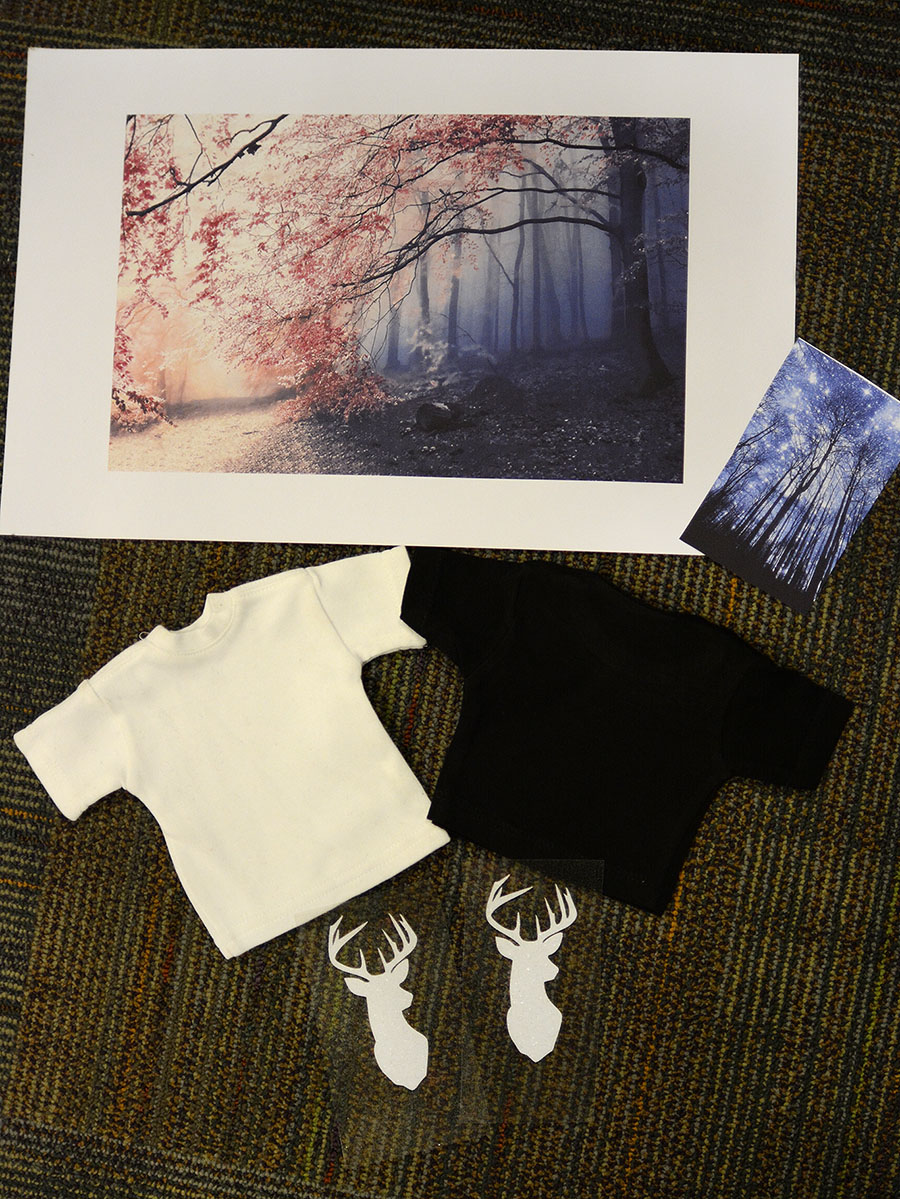
Materials:
• 1 black and 1 white 100% cotton sample shirt
• White glitter flake vinyl
• 2 images printed on sublimation paper
(The big image is sized to cover the whole area of the white shirt)
Step 1:
Cut and weed out your design out of the white glitter flake vinyl. Press the vinyl onto your material. I used 320 F for 5 seconds. Since I will be transferring an image for additional 30 seconds later on, the initial press should be just a few seconds enough for the vinyl to adhere.
Step 2:
Cut out your images to fit the design. For a black garment, all you need is the size of the vinyl design with some bleed area (extra printed area around the image to make alignment much easier and error-free). For the white garment, the fabric will be dyed as well, so size the image to be slightly bigger than the whole garment. I pressed the images for 45 seconds at 380 F. That seemed to produce the most vibrant transfer from various times tested at that temperature.
Note: The white fabric will fade and wash off little by little but the vinyl design will remain bright longer. This method is experimental only and the vinyl in itself was not designed for sublimation, it just happens to work with it. Not recommended for every day garment wear since due to the total pressing time of the vinyl, cracking and wear and tear may occur earlier. We have not tested the durability of it on T-shirts over time. Best used for décor.
It is February and Valentine’s theme is all around us. With that in mind, we are bringing you detailed instructions on customizing and creating your own rhinestone template designs that you can fall in love with! All you need is the Cameo, Silhouette Studio Designer edition, Sticky Flock, and of course – rhinestones!
To install the Designer edition- open the Silhouette Studio® software program, go to the “Help” menu, select” Upgrade Silhouette Studio”, enter the following: Designer Edition license key, Silhouette account email address, Silhouette account password. Click on the “Submit” button. The license key will then be applied and the software will be upgraded immediately. If you need to locate this number, you may find it by signing into your account either in the Silhouette Design Store in the software, or by signing into your account through the website. Once logged in, you may go to the My Account page. Your license key code will be listed under Silhouette Studio Keys. In the Silhouette Design Store, the number is listed at the bottom of the main account page. The Silhouette Studio Designer Edition code can only be applied twice.
You can create designs in Silhouette Studio’s Designer Edition by converting simple images to rhinestones, by point and click or completely freehand drawing. In our example, we have combined all three options.
Open your image by going to File, then Open:
A simple silhouette or an outline is easy and more flexible to work with for rhinestones.
In the page settings window, adjust the size of your rhinestone template material (StickyFlock). We are not using a cutting mat for our example so our setting is “none”, however if using a cutting mat, select the cutting mat size from the drop down menu. It is important to do these steps in order to size and place your design correctly based on the cutting area you are dealing with. page settings If you are working with JPG, BMP, PNG or another type of raster file, you will have to trace the image to create a vector version of it. Refrain from scaling up the image for now. NOTE: Raster graphics can typically be scaled down with no loss of quality, but enlarging a raster image causes it to look blocky and “pixelated.” Because vector-based images are not made up of a specific number of dots like rasters are, they can be scaled to a larger size and not lose any image quality. Raster files: BMP, .TIF, .GIF, .JPG Vector files: .AI, .EPS, .SVG, .DRW
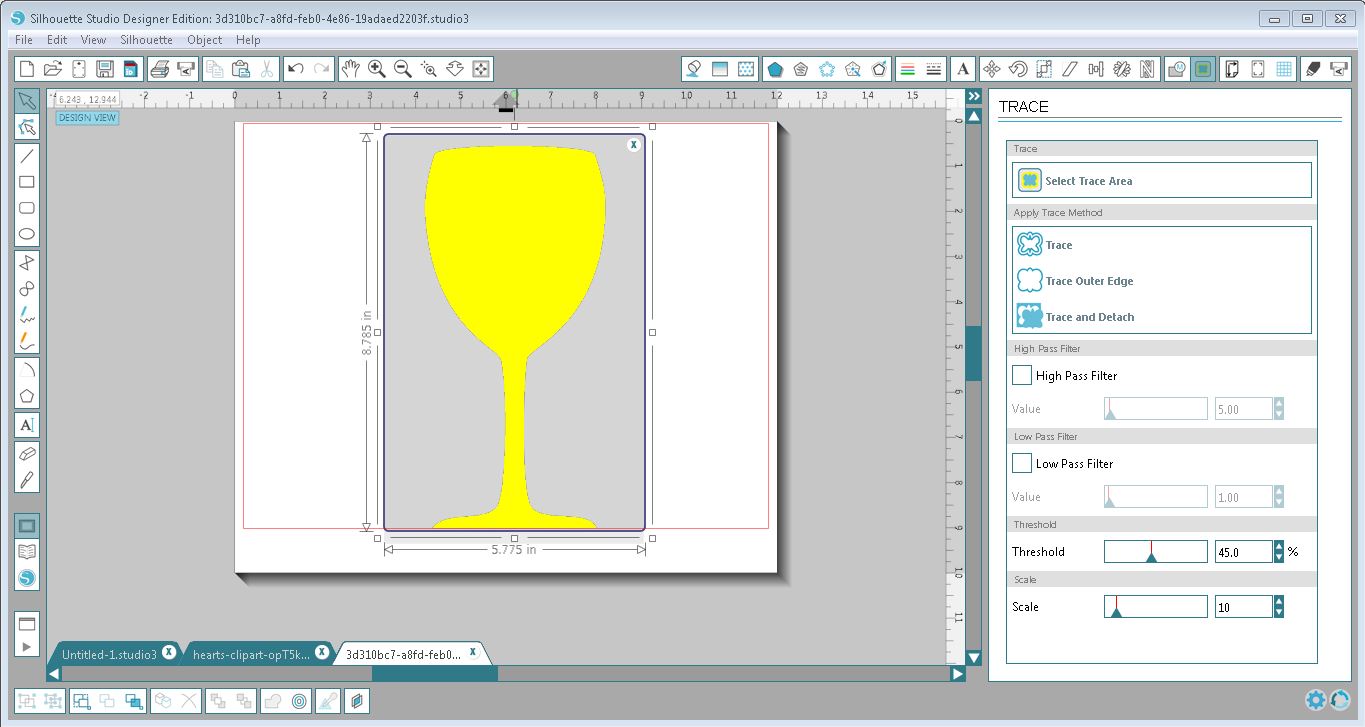
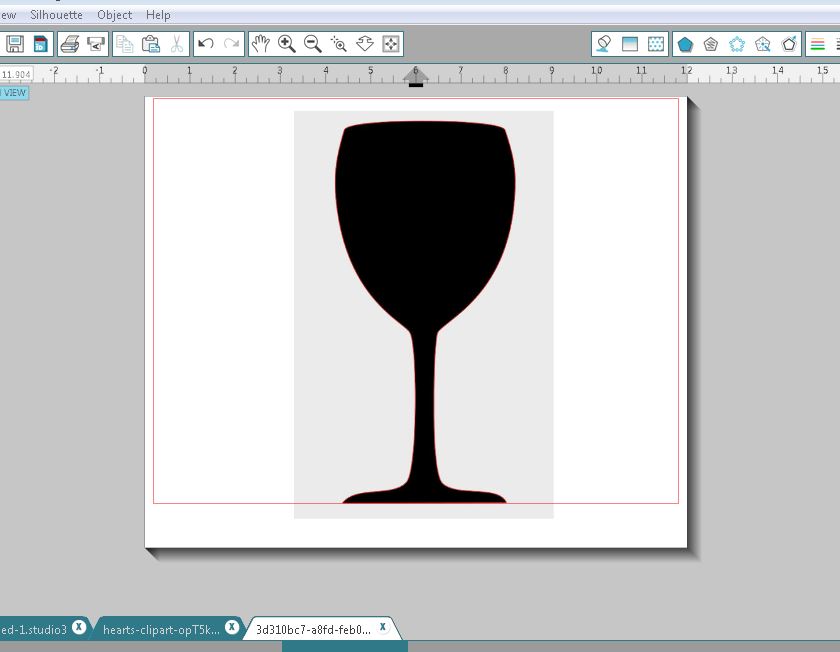
For our example, we traced around the wine glass silhouette, unchecked both High Pass and Low pass filter and selected Trace Outer Edge since we don’t have any details. Your object should be completely yellow to tell the program what it is tracing around. traced glass Before selecting Trace Outer Edge- object is all yellow
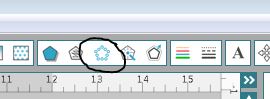
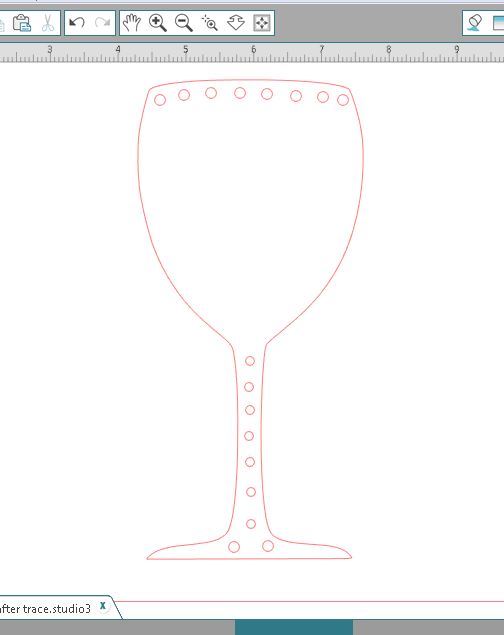
After selecting Trace Outer Edge- there is now a red outline around the object. We moved the image slightly to the right to see if we are satisfied with the result. The black silhouette layer is the raster image and the red outline layer is the vector image. 4. You can go ahead and delete your raster image as you don’t need it anymore. What you should be left with is just your traced outline (vector). With the image selected, you can comfortably size your vector image bigger or smaller by dragging one of the four corners in or out.
Once you have the size you want, click on the “Rhinestone Window” button.
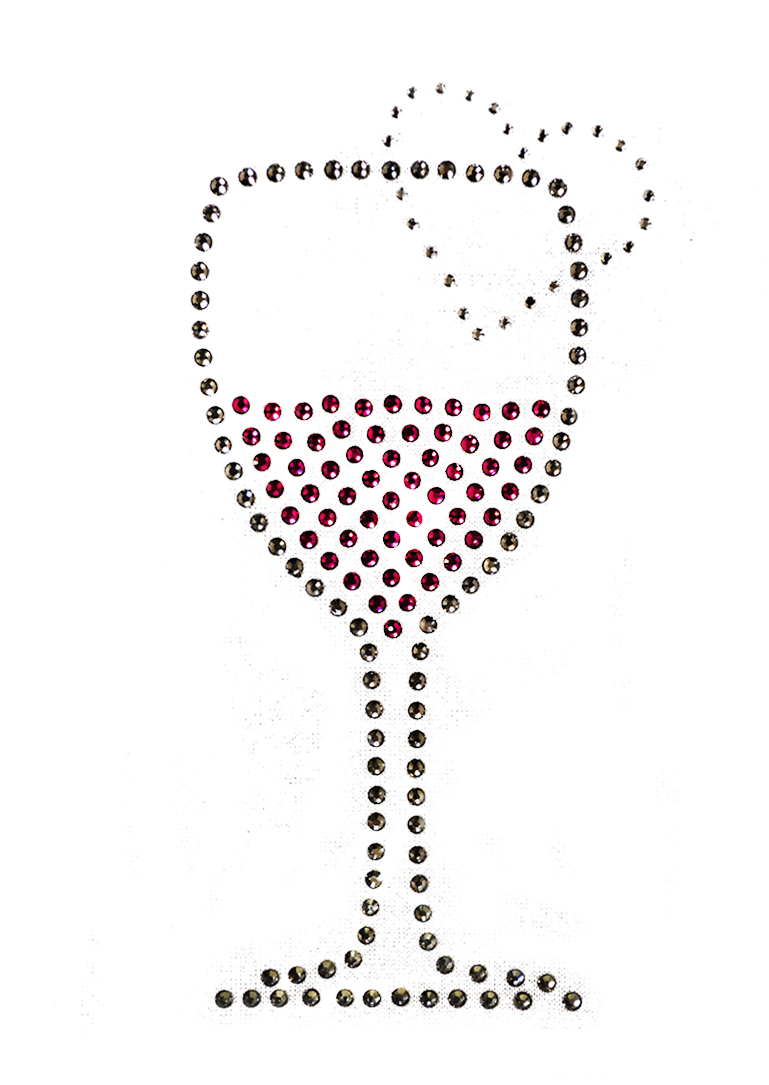
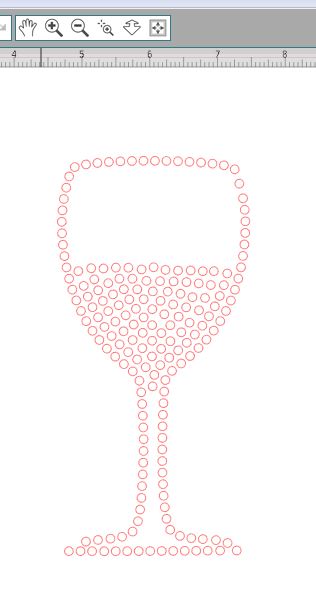
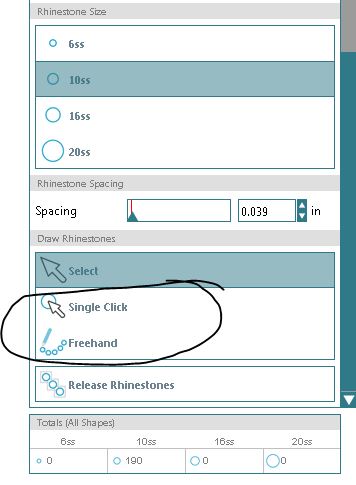
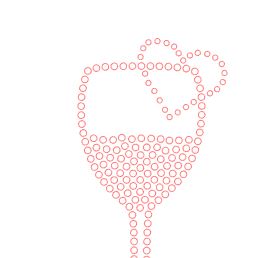
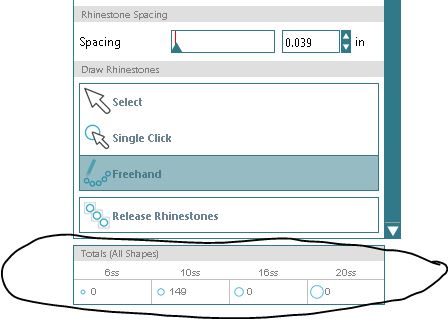
With the image selected, click on one of the options on the right under Rhinestone effect. The four options are None, Edge, Linear Line and Radial Fill. The Edge option lines your design edge with rhinestones, while the Linear and Radial Fill fill the design with various patterns. Play around and see which one produces your most desired effect. Then under Rhinestone size, select the size of rhinestone you would like. Smaller sizes result in more detail. rhinestone fill For our design, we selected radial fill and 10 ss.
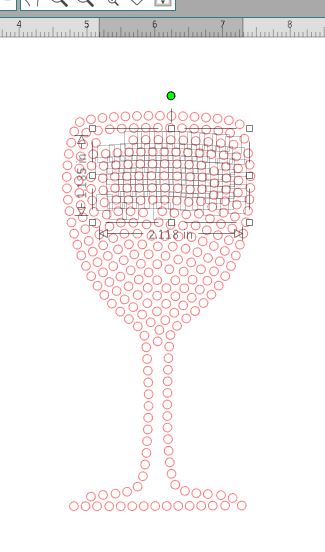
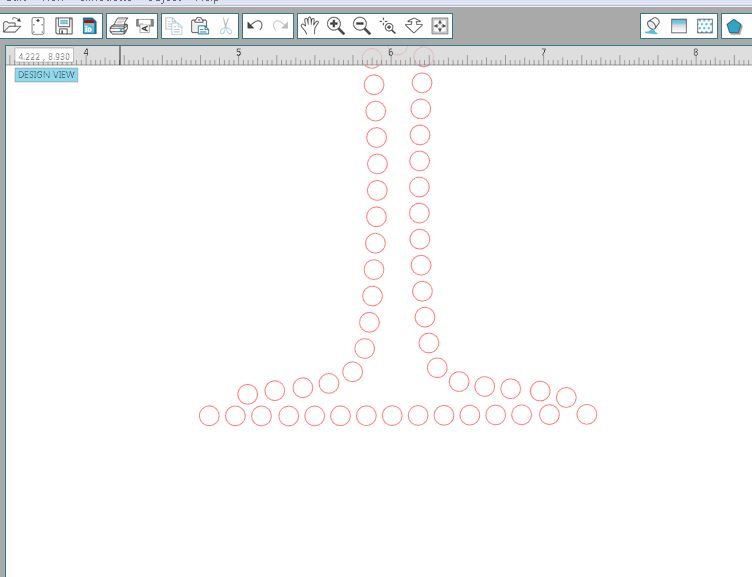
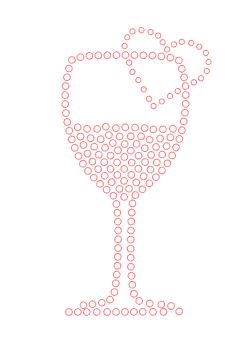
At this point, we are ready to customize our design. The first step in our design is to remove half of the rhinestones in the glass so it looks like there is liquid about halfway up. Also there are some details at the bottom of the glass that we want to remove as well. To do that, have your image selected and on the right within your settings, scroll all the way down and click on Release Rhinestones. Now you have each individual rhinestone separated from the others. By clicking on one, you can move it or delete it and by clicking in an empty area and dragging, you can select multiple rhinestones.
Before (click and delete)After
Finished
After removing the desired areas, you can then place rhinestones by hand using either the Single Click or Freehand option on the right.
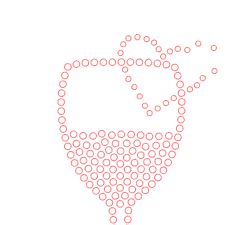
We created the heart on top of the wine glass by drawing it in that position using the Freehand option and selecting the 6ss size rhinestones. After what roughly looked like a heart, we selected all newly created areas, clicked on Release Rhinestones and moved around the rhinestones to shape them into a perfect heart. If there are gaps, you can add a single rhinestone at a time by selecting Single Click.If you have overlapping sections, you will have to delete extra rhinestones by individually selecting them. You may have to move a few or add an extra one here and there to make the design more complete. 10. Once you have your design finalized, you have the option to leave it as is or group all the rhinestones back together to have one cohesive piece that you can move. Click and drag around all elements, then right click and choose “Group.”
DO NOT resize your design once it has been converted to rhinestones. The rhinestone size has been set and drawn exactly as is, so if you resize and run it through the cutter, the holes will not match the rhinestones.
You can find out how many rhinestones your design requires once finished. In the Rhinestones settings page, all the way at the bottom there is Totals (all shapes) section. That shows the total number used from each size.
Enjoy your design! Here is ours!
Mix and Match Idea!
You can mix in rhinestones with a vinyl cut design. Just use the Single Click option to add exact size rhinestones to any design. The cutter will cut them out and once you press your vinyl on your material, you can then place your rhinestones in the sized holes within the design and press again.
If you have any questions or comments about our blogs, please email info@coastalbusiness.com and we will be happy to help!
 Materials: